The 3D Clipart Tab

Integrated Component Clipart

The Clipart tab provides quick and convenient access to V3M files or 2D vector artwork.
This tab includes the library browser that allows you to add folders containing V3M Files into the software or you can use the local files option that allows you to quickly see the contents of several folders of V3M files in one place.
By default the Clipart tab can be found on the left-hand side of the Aspire main window, alongside the Drawing, Modeling and Layers tabs.
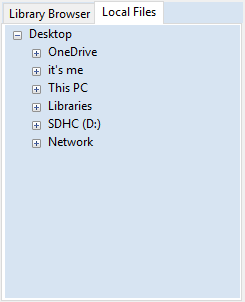
The 3D clipart tab itself contains two tabbed pages: Local Files and Library Browser. You can swap between these pages by clicking on the page names at the top of the tab.
To import a file as a piece of clipart you can simply double click its thumbnail to position the clipart in the center of the job. You could also Right click on a piece of clip art and choose the option, this has a sub-menu that allows you to choose an existing Level or to create a New Level. When creating a New Level you will be prompted to enter a name and choose a combine mode. You can also click on a preview image and 'drag and drop' its thumbnail from the clipart browser, into the 2D or 3D View. To do this:
- Move your mouse over thumbnail image in the clipart browser.
- Press and hold down the left mouse button.
- While holding down the left mouse button, move the mouse back into the 2D or 3D View.
- A copy of the thumbnail image will be 'dragged' with the mouse pointer.
- Release the mouse button to 'drop' the clipart file into the 2D or 3D View.
The selected component clipart model or vector outline will be imported at the location of the dropped thumbnail and, if appropriate, added to your model's Component Tree. Depending on the relative size of your current Aspire model and the piece of clipart you have imported, it may need to be resized to fit using the standard tools on the Drawing tab or directly using the transform handles within the 2D View.

Library Browser
The library browser provides quicker access to folders on your computer which are in frequent use, or perhaps hold the data for the current project you are working on.
To add a folder into your library click on the button which opens up a dialog asking you to choose the folder you would like to add. Navigate through the tree to choose then folder and click OK. Unlike the Local Files browser the Library browser will only show the clipart that within this folder and folders within this folder. You will not be able to see the whole of the file tree beneath this folder.
Once you have populated your library with folders then clicking on a folder will populate the clipart browser with the objects which are contained in this folder and show you any subfolders immediately below it.
To better understand this, consider the following example: My current project is a western saloon themed sign. I have split up all the resources I am using for this creation into three folders, so that I have the following file folder structure:

Once I have added the Western Saloon folder to my Libraries it appears in the list of folders. When a folder is selected all its immediate subfolders are also shown, but only the immediate subfolders, notice that the Toolpath Outlines folder does not appear in the image below.

If a folder is selected and it contains clipart files then these are shown in the clipart window.
To remove a folder, select from the list of folders and click on the button. This will not delete clipart from your computer; it will just remove the library folder. Folders may be added to the library from the local file browser by right clicking and selecting the Add folder to library option.


Local Files
The local files browser allows you to select a folder using the file explorer tree in the top section of the page. When you select a folder containing Vectric files (*.crv or *.v3m) the bottom section of the page will fill with thumbnail images of the V3M or CRV files within each folder.
Integrated Windows Explorer Thumbnail Support

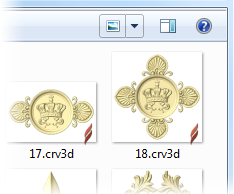
V3M files automatically include thumbnails. Windows Explorer can make use of these thumbnails to show you a preview of each file when you browse a folder.
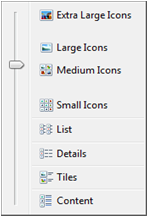
When browsing a folder containing V3M files in Windows, select Medium Icons or larger from the available options in the Change your view control, located at the top of the Windows Explorer view:

Thumbnails are supported for Windows XP and later, but the method of selecting thumbnail view in Windows Explorer may differ for other Windows versions.
Drag and Drop
Aspire supports Windows drag and drop functionality to quickly add V3Ms into an existing model directly from Windows Explorer.
With Windows Explorer and Aspire both open, simply click and drag the V3M thumbnail of the file you want from the Explorer Window into either the 2D or 3D View window of Aspire. The selected V3M file will be imported automatically and added to the Component Tree.